Project Setup
The steps to get a project up and running will depend on the bundler we use. A bundler is a tool that processes, transforms, and bundles a project’s files into optimized assets ready for the browser.
In Terra, we use Webpack (old projects) or Vite (preferred bundler).
How to Identify the Project Type
Section titled “How to Identify the Project Type”You can confirm it’s a Vite project if you see configuration files like:
vite.config.js
In contrast, Webpack projects will typically include files such as:
webpack.common.jswebpack.dev.jswebpack.prod.js
For Vite Projects
Section titled “For Vite Projects”Make sure you’re using a Node.js version 20 or 21 (preferably 21) for this project.
You do not need to modify or configure anything in the vite.config.js file.
However, you should review the following three Vite environment files, located in the root of the theme directory along with vite.config.js:
.env.local.env.production.env.virtual
What to Look for in Environment Files
Section titled “What to Look for in Environment Files”Focus on the following variables:
VITE_BASEVITE_WP_PATH
You will only need to configure:
-
The name of the WordPress installation, usually defined as:
wp-${clientname} -
The theme name, typically matching the GitHub repo name:
${clientname}-wp-theme
For Webpack Projects
Section titled “For Webpack Projects”Webpack projects are particularly sensitive to the Node.js version being used. The project might not run at all if the version isn’t compatible.
Also, pay attention to terminal messages — they often clearly indicate problems, such as:
- Vue version X is not compatible with your current Node version.
- You may need a newer Node version.
- You might need to run commands like
npm clean cacheto fix environment issues.
Entry Points
Section titled “Entry Points”Entry points for each page in the project are defined in:
webpack.common.js
Environment Configuration
Section titled “Environment Configuration”To get the project running in virtual environments or even for successful builds, go to:
config > index.js
There, set the following:
-
wordpress_folder→ usually:
wp-${clientname} -
theme_name→ typically matches the GitHub repo name:
${clientname}-wp-theme
WordPress Media Settings – Define Image Sizes
Section titled “WordPress Media Settings – Define Image Sizes”When managing media uploads in WordPress, it is essential to configure the image size settings under the Media Settings page. These settings define how WordPress generates additional image sizes when an image is uploaded to the Media Library.
You can access this page here:
http://{YOUR_URL}/wp-admin/options-media.php
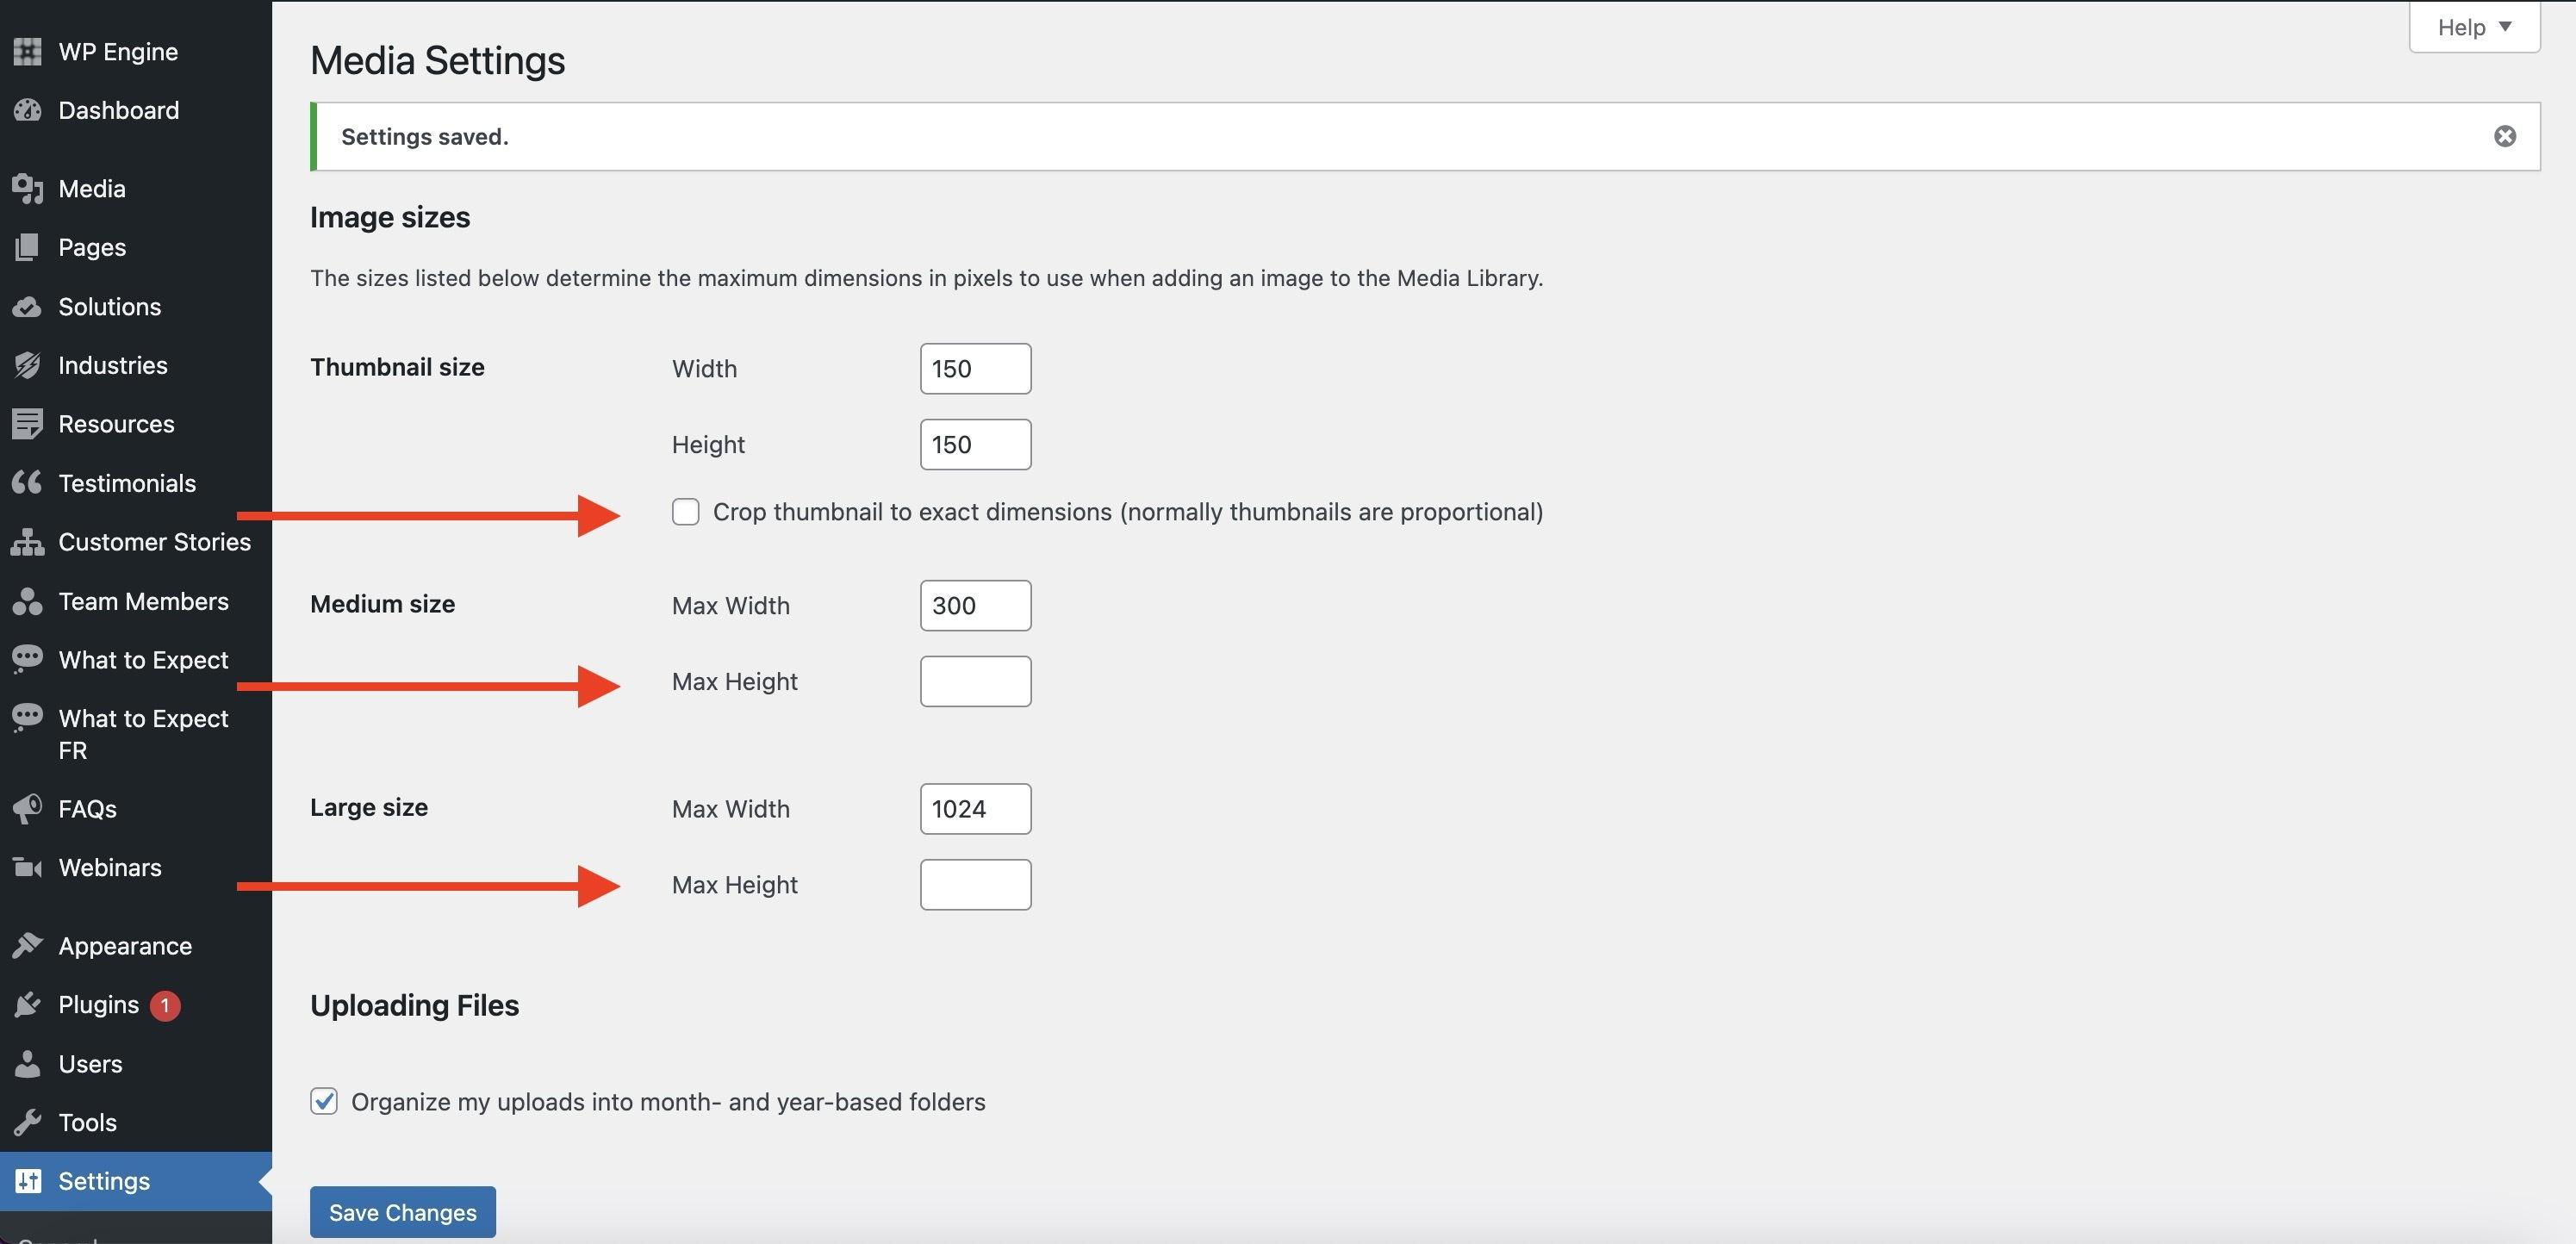
What Are the Image Size Settings?
Section titled “What Are the Image Size Settings?”WordPress automatically generates three versions of every uploaded image:
- Thumbnail size: Used in galleries, archives, and widgets. You can choose whether the thumbnail should be cropped to exact dimensions or maintain its original aspect ratio.
- Medium size: Ideal for in-content display or listings.
- Large size: Typically used for feature images or wide display content.
Each size allows you to define:
- Maximum width
- Maximum height
If these are not set appropriately, you may end up with improperly scaled images, extra server load, or display issues in various parts of the site.
Why It Matters
Section titled “Why It Matters”Setting image sizes:
- Ensures design consistency across your site
- Helps optimize page speed by preventing large images from being used unnecessarily
- Allows ACF, theme templates, or page builders to correctly display media
It’s important to watch this video to have full context of the explained topics. If the video doesn’t load or stops with an error, you can watch it directly on Loom.
Knowledge Check
Test your understanding of this section
Loading questions...