WP Engine
WP Engine is the hosting platform we use for some WordPress projects. It provides environment management, automatic backups, and deployment tools.
This section explains how WP Engine environments work, how we use backups, and how we deploy code.
Environments
Section titled “Environments”Each WP Engine project usually has three environments (same ones as we use in Terra): Development (Dev), Staging (Stage) and Production (Prod).
Not all projects have all three environments created by default. We need to create them when needed. For example:
- Some projects may start with Dev only
- Stage is created when needed
- Production must be created manually if it doesn’t exist yet
Create a new environment
Section titled “Create a new environment”- Click Add environment
- Start from a blank environment
- Select the environment type
- Assign a name
- Confirm creation
Once created, the environment behaves like any other (with backups, deploys, etc.).
Backups
Section titled “Backups”Automatic backups
Section titled “Automatic backups”WP Engine automatically creates daily backups for each environment.
- Backups are environment-specific
- Dev, Stage, and Production each have their own backup history
Manual backups
Section titled “Manual backups”Before making major or risky changes, we usually create a manual backup.
When creating a manual backup, you can:
- Add a description
- Choose who receives notifications
This gives us a safe restore point in case something goes wrong.
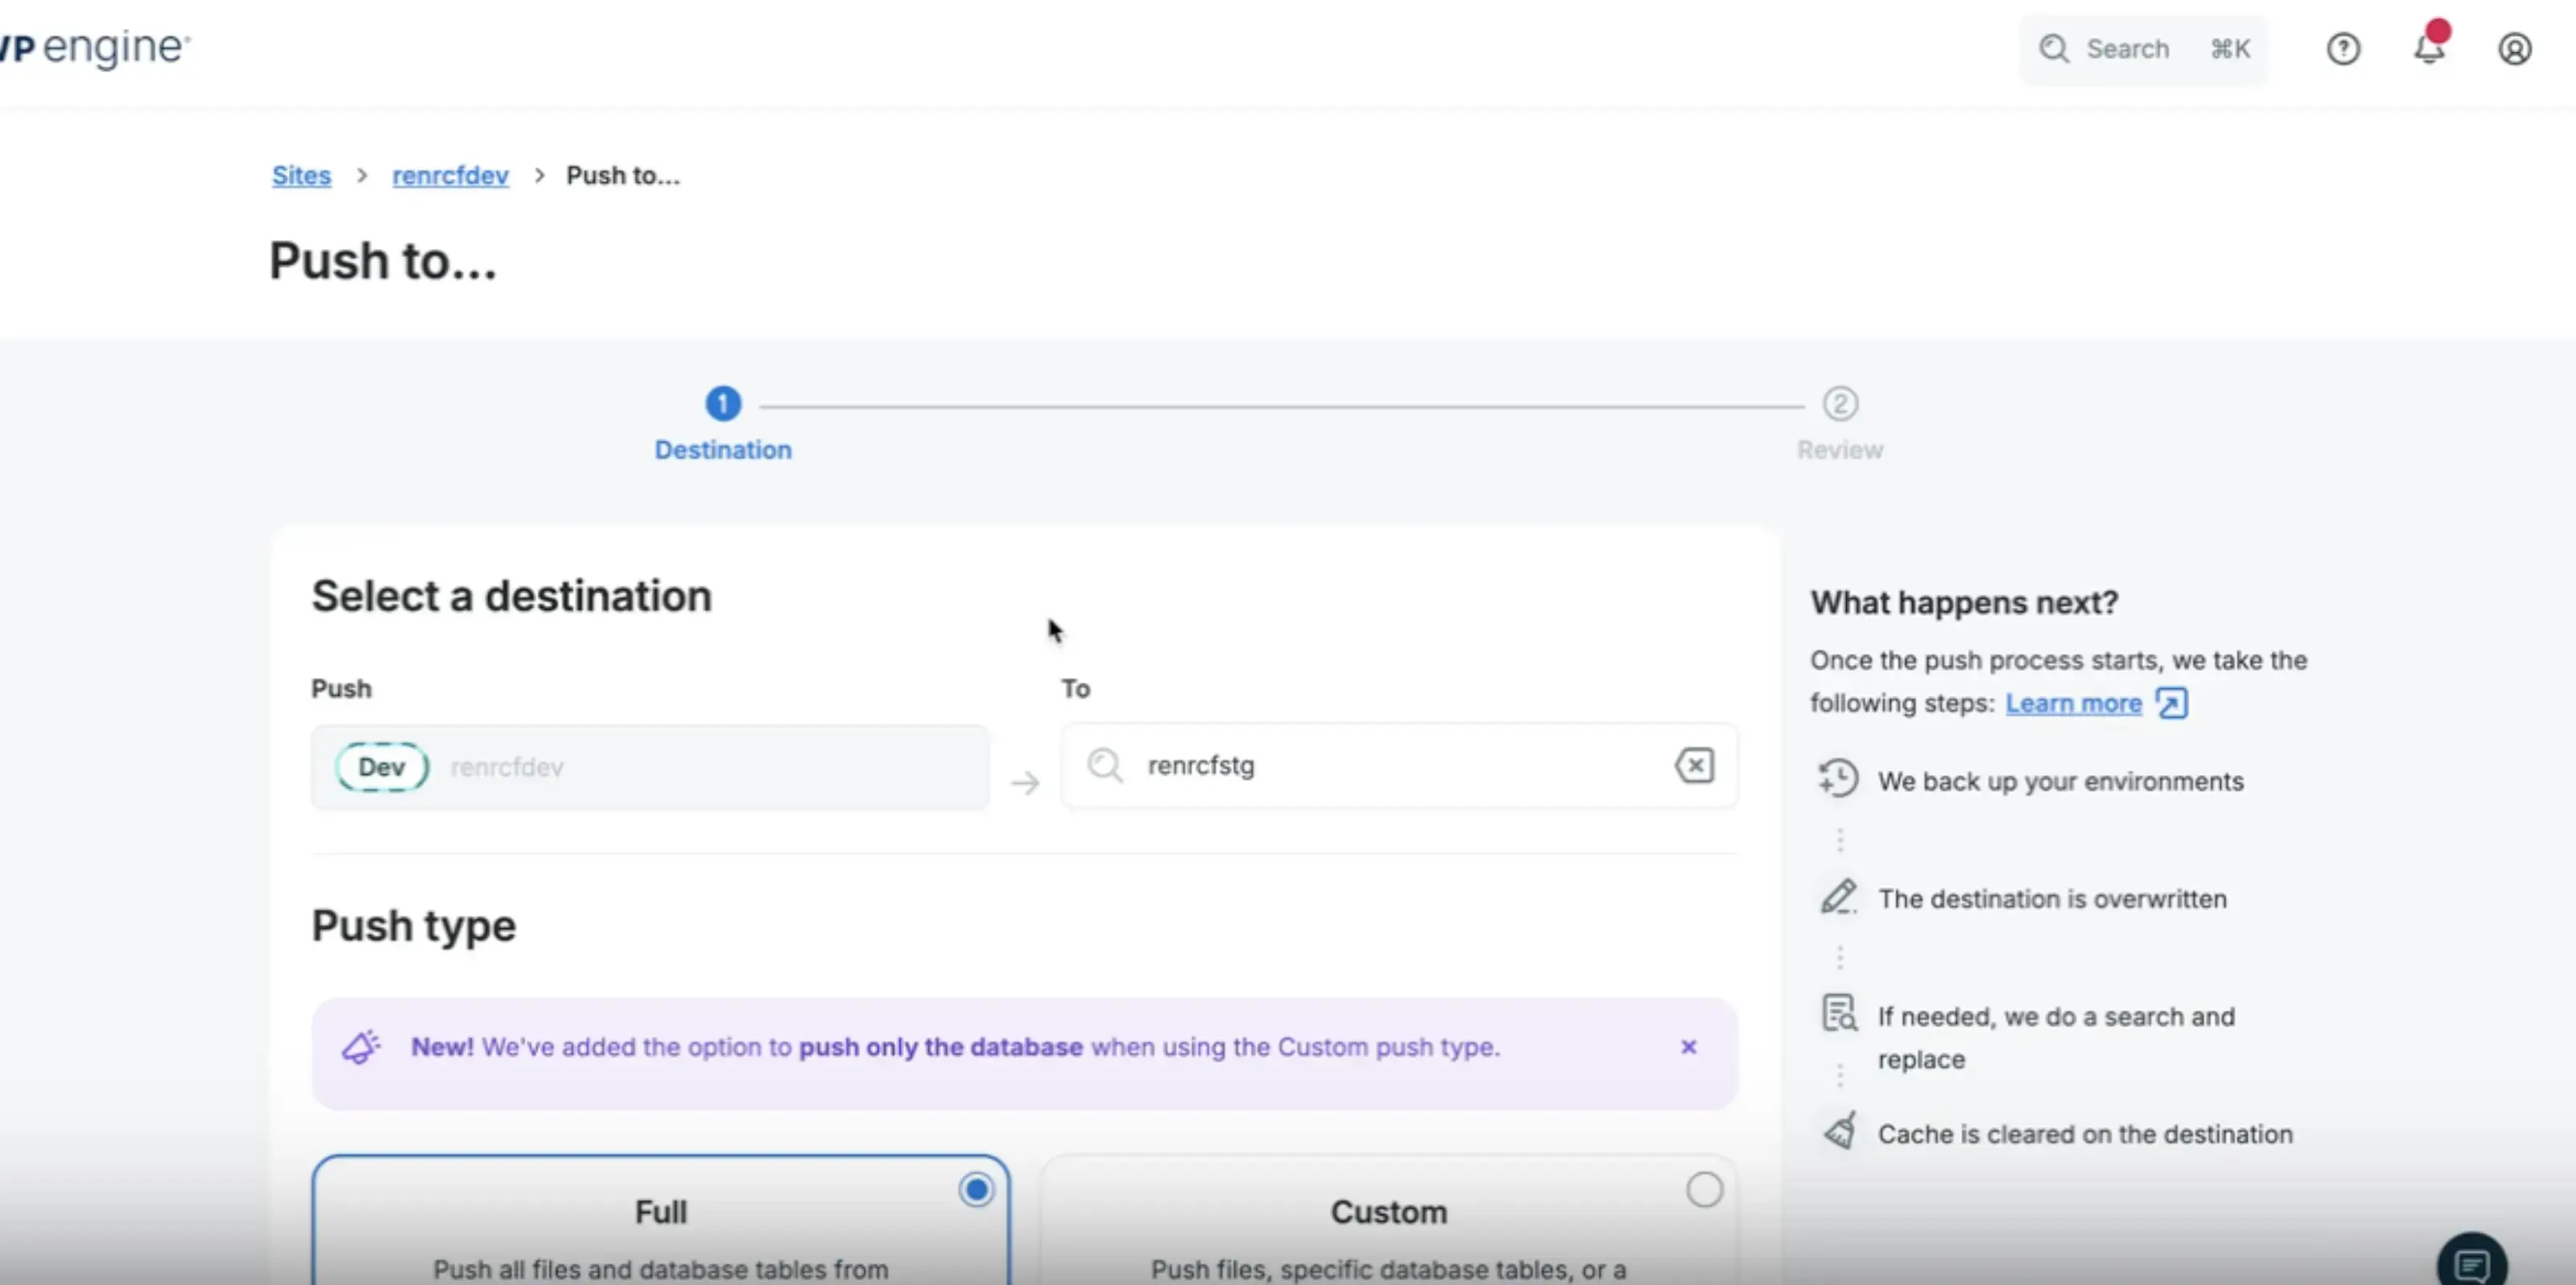
Pushing and pulling environments
Section titled “Pushing and pulling environments”When sharing work with a client or preparing a release, we often sync environments.
Push (e.g. Dev → Stage)
Section titled “Push (e.g. Dev → Stage)”From Dev, you can push changes to another environment:
- Click Push
- Select the target environment (Stage)
- Choose Full push
Pull (e.g. Dev → Stage)
Section titled “Pull (e.g. Dev → Stage)”Alternatively, from Stage you can:
- Click Pull from
- Select the source environment (Dev)
- Choose Full
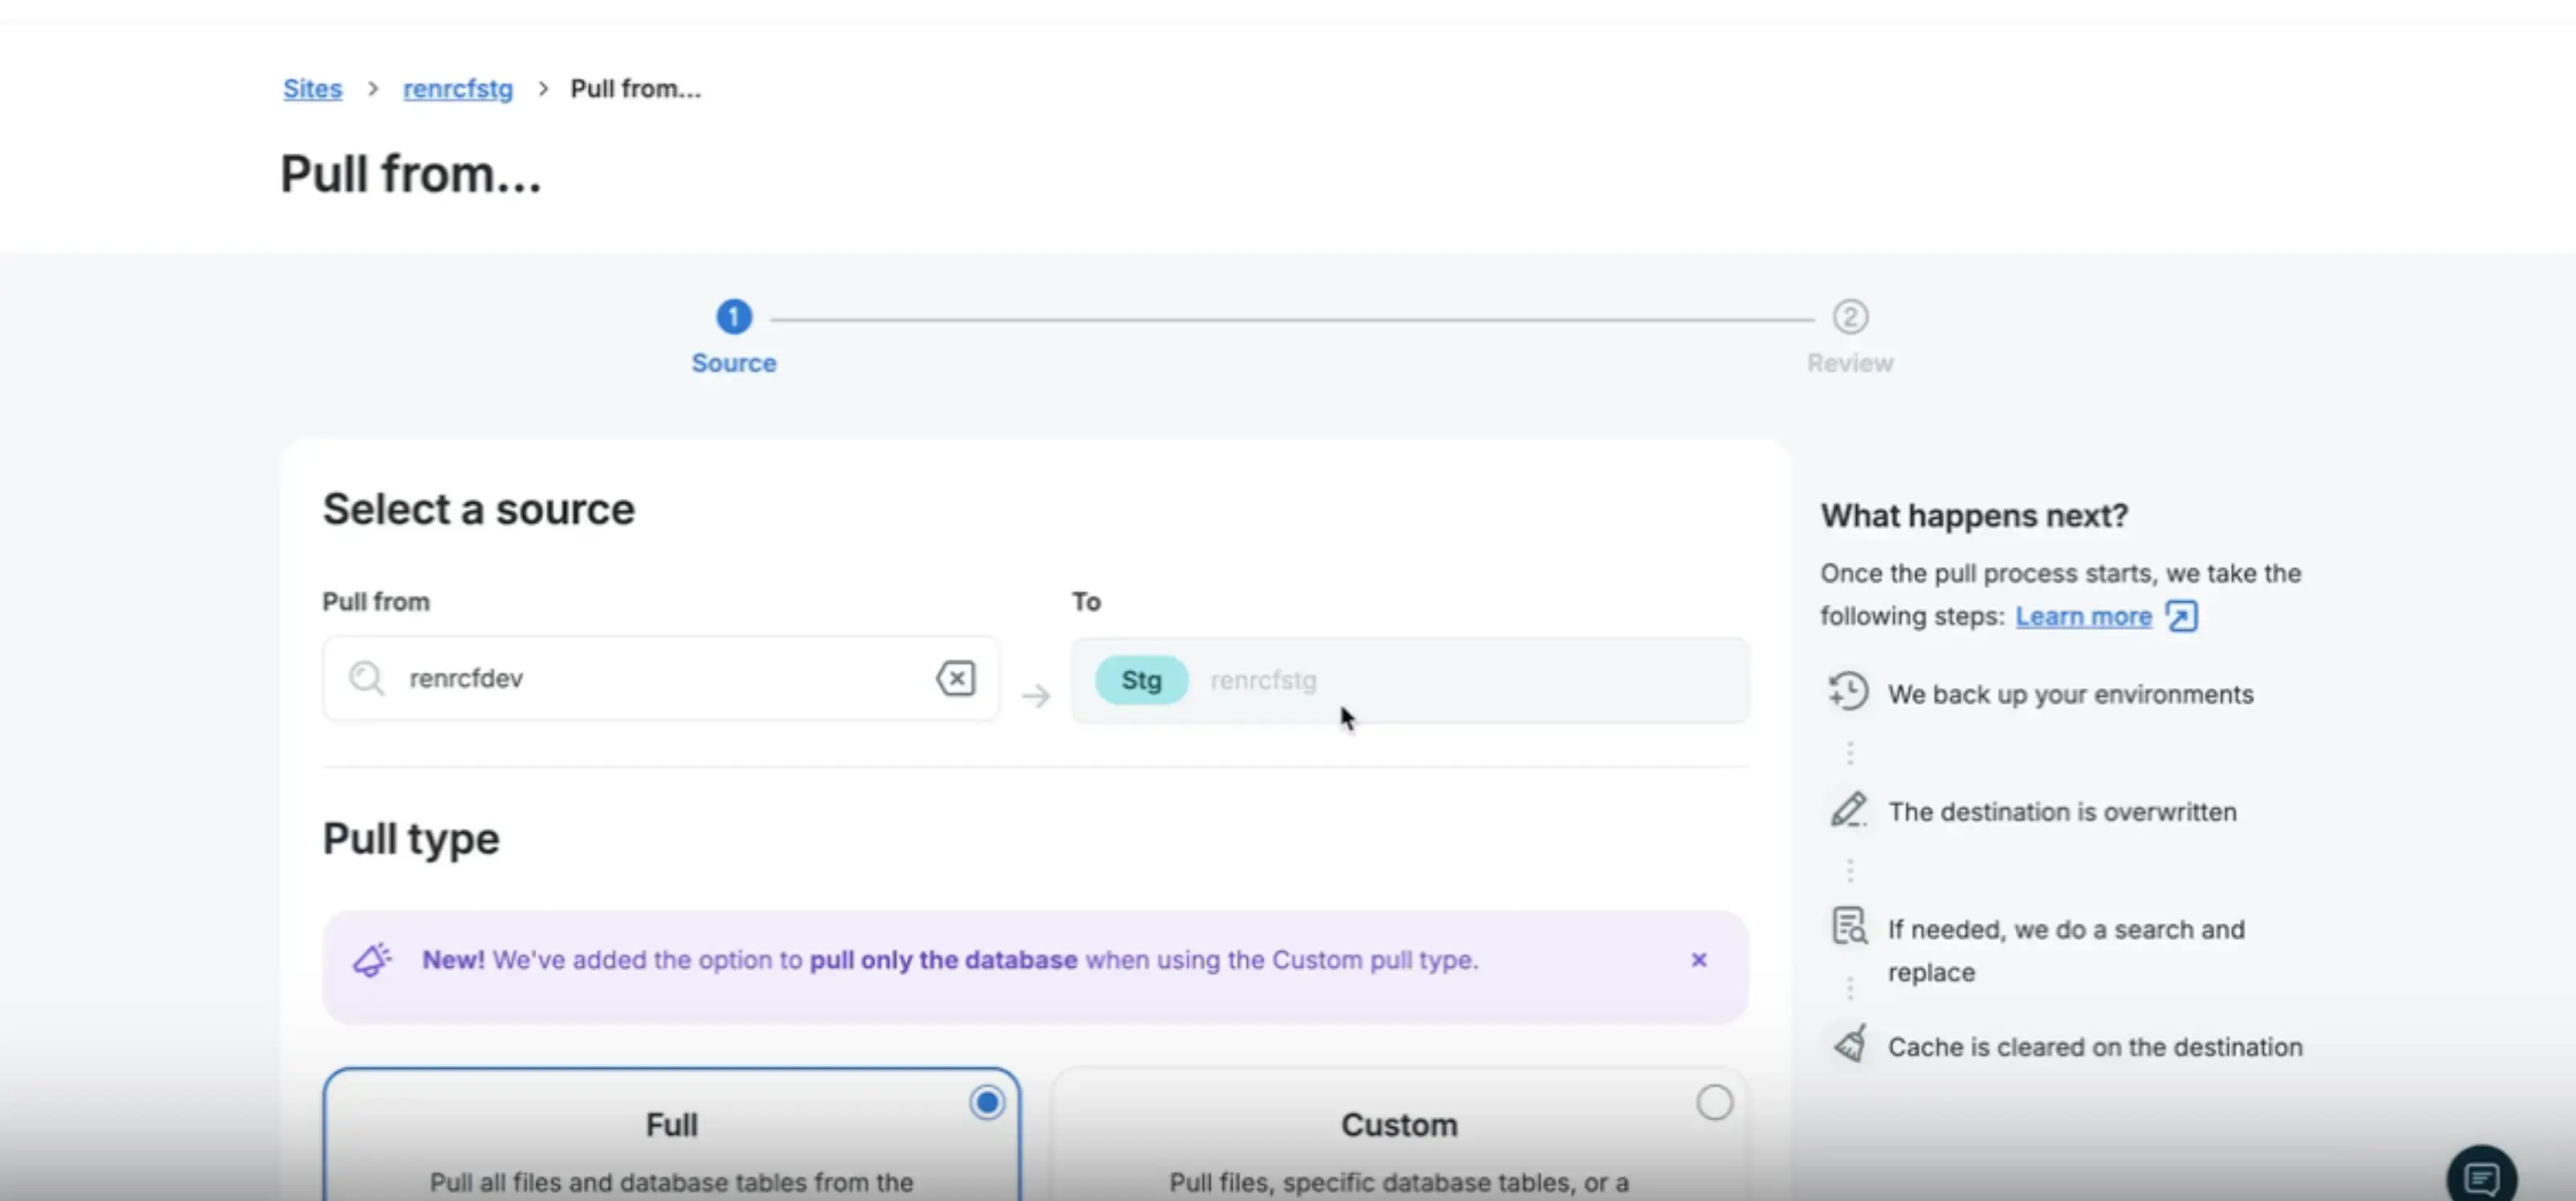
The arrow direction indicates where the content is coming from. These two examples do the same: taking everything Dev has into Stage.
Deployments (SFTP)
Section titled “Deployments (SFTP)”Deployments in WP Engine are done via SFTP.
Creating an SFTP user
Section titled “Creating an SFTP user”When a new environment is created, SFTP access is not created automatically.
To enable deployments:
- Go to SFTP Users
- Add a new user
- Name it (usually prefixed with
terra) - Generate a password
- Copy the password before saving
- Save the user
Configuring deploys
Section titled “Configuring deploys”After creating the SFTP user:
- Go to the project repository
- Open the SFTP configuration
sftpConfig.jsfile - Update:
- Host
- Username
- Password
- Path (theme path is always the same)
Once configured, the environment is ready for deployment.
Best Practices
Section titled “Best Practices”- If you need to perform an action and don’t have access, contact someone who does.
- Always make a manual backups before making risky changes
- Daily backups are created automatically
Knowledge Check
Test your understanding of this section
Loading questions...